Looking for home cardio equipment that you use sitting down, that works your arms and legs at the same time and does not take up half the living room? Sooner or later you will come across the terms recumbent elliptical, seated elliptical, seated stepper or cross trainer. Each of these names covers a slightly different design, and it is easy to get lost in store descriptions. In this guide we explain what the Teeter FreeStep is, how the stepping motion works in a seated position, what exactly you can adjust (seat, backrest, handles, resistance) and how the FreeStep LT1 and LT3 models differ. You will get a comparison table with manufacturer data, the dimensions you need to plan the space, tips for the first setup and maintenance, and answers to the questions we hear most often in our customer service department. No promises of "miracle results" - just specifics that will help you choose the right model.
What is a recumbent elliptical and what is the Teeter FreeStep?
A classic elliptical (elliptical trainer) is a machine you use standing up: your feet move along an elliptical path while your arms push and pull moving handlebars. A recumbent elliptical - also called a seated elliptical - takes a similar idea of working the arms and legs into a seated position. You sit in a chair with a backrest, your legs push the pedals in front of you, and your arms work handles linked to the pedals.
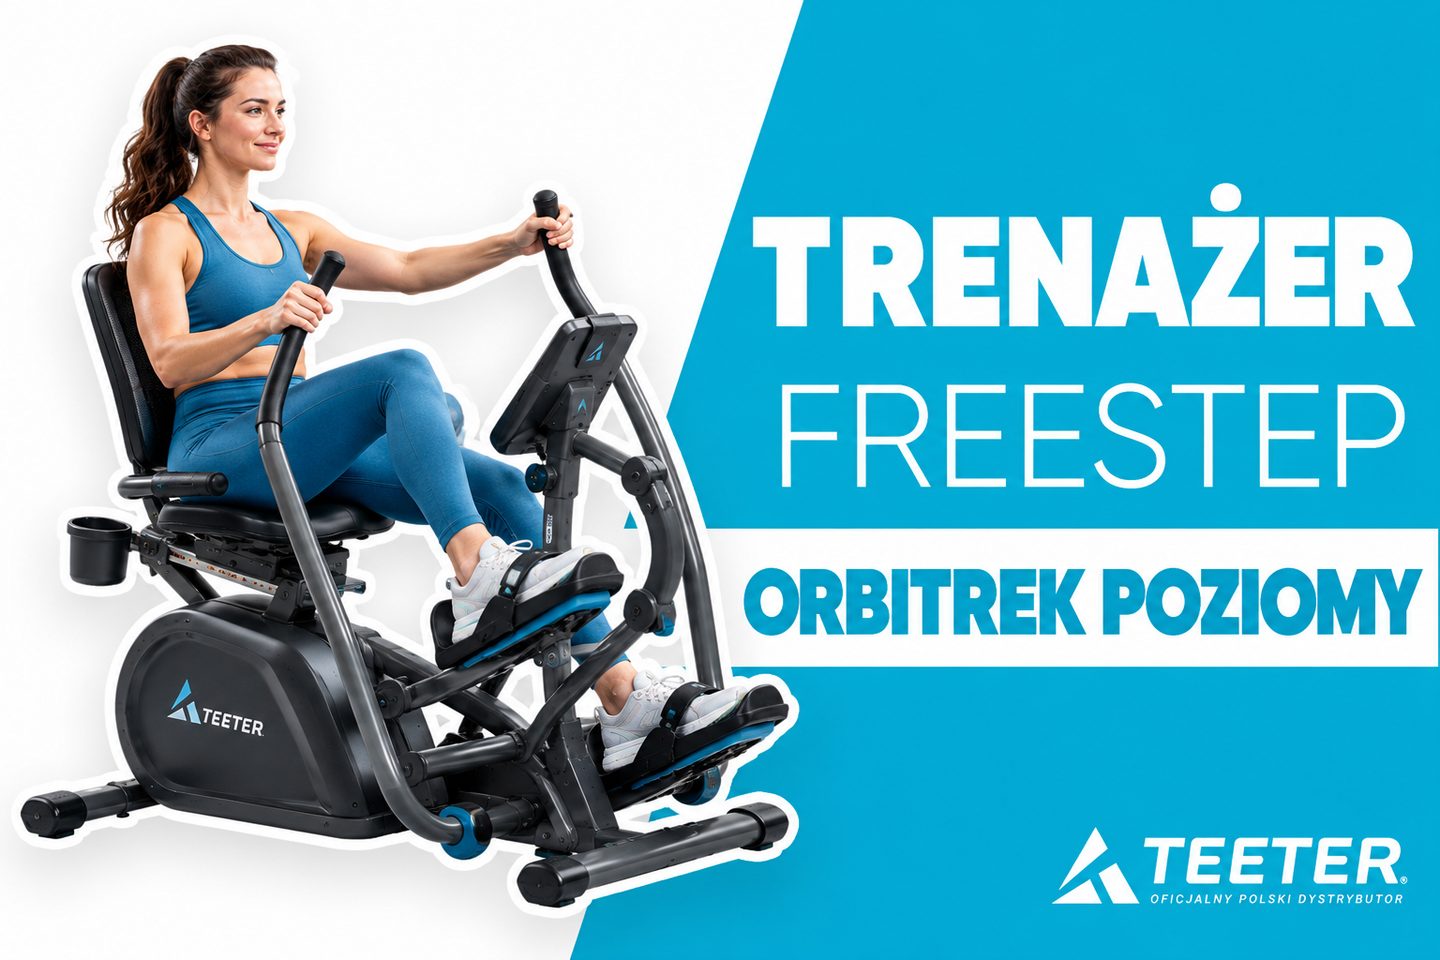
The Teeter FreeStep is exactly this type of trainer. The manufacturer calls it a "Recumbent Cross Trainer", that is, a seated cross trainer. It is best described as a seated stepper with moving handles: the pedals do not go round in circles as on a bike, but make a stepping motion - one leg pushes while the other returns. The handles are linked to the pedals, so when your right leg goes forward, your left arm works in the opposite direction. Teeter calls this design Dual Power Motion - power from your arms and legs at the same time.
The key design features of the FreeStep in brief:
- Seated position with a backrest - a height-adjustable seat and a backrest that reclines into 3 positions.
- Stepping motion - your feet rest on the pedals the whole time - you do not lift them and put them back down as when walking or running.
- Adjustable moving handles - you set the length to suit your arms and rotate the grip to a vertical or lower position.
- Magnetic resistance with 13 levels - adjusted with a knob, in a range of 0-110 lb according to manufacturer data.
- Battery-powered console - shows time, distance, speed and estimated calories burned; the machine does not need an outlet.
- Transport wheels at the back of the base and leveling feet.
You will find both FreeStep models we offer in the FreeStep Trainers category, and more broadly in the Teeter Equipment section. You can browse the brand's full range, including accessories, in the Teeter.pl store.
Recumbent elliptical, recumbent bike, stepper - what is the difference?
Stores use these names interchangeably, so it is worth distinguishing the three types of equipment the FreeStep is often confused with:
| Type of equipment | Position | Leg motion | Arm work |
|---|---|---|---|
| Classic elliptical | standing | elliptical path | yes, moving handlebars |
| Recumbent bike (exercise bike) | seated with backrest | circular pedaling | usually not |
| Classic stepper | standing | up-and-down step | usually not |
| Teeter FreeStep (seated cross trainer) | seated with backrest | forward-pushing stepping motion | yes, handles linked to the pedals |
In practice, the FreeStep combines the position of a recumbent bike with the arm work of an elliptical and a stepping motion instead of pedaling. That is why people type all these names into search engines at once - while they are looking for one machine.
How does the stepping motion work in a seated position?
You sit on the seat, rest your back against the backrest and place your feet on the pedals - the manufacturer recommends keeping your toes in the upper part of the pedal. The pedals are mounted on arms connected to the flywheel. When you push one leg out, the other comes back toward you, and the handles move together with the pedals. You can power the machine with your legs alone, your arms alone or - which is the basic mode - both pairs of limbs at once.
The movement is smooth, and resistance is generated by a magnetic brake. On the LT1 product page, the manufacturer emphasizes quiet operation ("Whisper-Quiet Operation"), which matters in an apartment building or when family members are sleeping on the other side of the wall. It is worth remembering one thing from the manual: the pedals keep moving for a moment after you stop working - the flywheel has its own inertia. That is why you should always slow down gradually rather than abruptly.
Three exercise modes according to the manufacturer's manual
The FreeStep manual describes three basic ways of using the trainer:
- Standard - arms and legs. The seat is set so that your knee is slightly bent at full leg extension, the backrest is upright and the handles are in the vertical grip. The manufacturer advises shifting the effort between muscle groups so that you do not keep tiring the same ones.
- Legs only. The backrest is reclined, the handles are set in the lowest position and moved outward, and your hands hold the seat handle at the back.
- Arms only. The seat is set so that your feet rest comfortably on the front beam under the console with your knees slightly bent, and the handles are in the lower grip. An overhand or underhand grip changes how your arm muscles are engaged.
Reclining the backrest and changing the handle grip are the two simplest ways to vary your workout without changing the resistance. According to the manual, the vertical grip engages more of the biceps, shoulders and chest in the forward pushing and pulling motion, while the lower grip engages the triceps, forearms and shoulders in the downward motion.
Who is the FreeStep seated elliptical for?
The FreeStep is home training equipment, not a medical device - it is not intended for treatment or rehabilitation, and that is how we describe it. From conversations with customers, we know it is most often chosen by:
- People who prefer seated training - with a backrest behind them, without balancing on their feet.
- People living in smaller apartments - the trainer is approx. 158 cm long and approx. 141 cm high, and the transport wheels let you move it against the wall after a workout.
- People who want to work their arms and legs on one machine - without separate equipment for the upper body.
- Households with members of different heights - the user range is 150-198 cm, and the seat and handles can be adjusted in moments.
- People who exercise while watching a show, listening to a podcast or using a tablet - the console has an integrated device holder, and there is a spot for a water bottle next to it.
Limitations mentioned in the manual: the maximum user weight is 136 kg, the machine is intended for home use indoors only, and children must not use it or be left unsupervised in the room where the trainer is located. The manufacturer also recommends consulting a doctor before starting any exercise program, especially if you are over 35 or have existing health problems, and stopping exercise if you experience pain, dizziness, shortness of breath or chest tightness.
FreeStep LT1 or LT3 - how do they differ?
This is the most common question we get about the FreeStep. The answer in one sentence: the mechanism, resistance and console are the same, and the LT3 is the version with a better finish on the parts you touch during your workout - the seat, pedals and handles - plus UltraGlide bearings. In its help center, the manufacturer explicitly lists four LT3 upgrades: SoftStep pedals, UltraGlide bearings, SureGrip handles and the ComfortSelect seat.
FreeStep LT1 vs LT3 comparison table
| Specification | FreeStep LT1 | FreeStep LT3 |
|---|---|---|
| Type | seated cross trainer | seated cross trainer |
| Resistance | magnetic, 13 levels (0-110 lb) | magnetic, 13 levels (0-110 lb) |
| Flywheel | 7 lb (approx. 3.2 kg) | 7 lb (approx. 3.2 kg) |
| Console | 3.5" LCD, time, distance, speed, calories | 3.5" LCD, time, distance, speed, calories |
| Seat | large cushion, height adjustment | ComfortSelect - thicker, with approx. 12% more surface area (according to the manufacturer), height adjustment |
| Seat position (front / back) | one | two mounting positions for the lower seat cushion |
| Backrest | reclining, 3 positions | reclining, 3 positions |
| Handles | adjustable, 4 positions | SureGrip PVC, adjustable, 4 positions |
| Pedals | large footrest area, edge guards | SoftStep with a rubberized pad |
| Bearings | standard | UltraGlide - steel ball bearings |
| Dimensions (L x W x H) | 157.6 x 82.5 x 140.6 cm | 157.6 x 83.0 x 140.6 cm |
| Machine weight | 48.5 kg | 50.0 kg |
| User height | 150-198 cm | 150-198 cm |
| Max. user weight | 136 kg | 136 kg |
| Console power | 2 AA batteries | 2 AA batteries |
| Tablet and bottle holder, transport wheels | yes | yes |
The data in the table comes from the product pages and the FreeStep LT1/LT3 assembly and owner's manuals published by the manufacturer. The warranty terms applicable in Poland are given on the FreeStep LT1 and FreeStep LT3 product pages - they differ from the terms for customers in the USA described in the American manual.
What do the LT3 upgrades mean in everyday use?
- ComfortSelect seat - it is thicker and has a larger surface area. In addition, the lower seat cushion can be mounted in a front or back position (changing it requires removing 4 bolts with the included Allen key). According to the manual, the front position gives the largest support area. This matters if you exercise for more than 15 minutes or so, or if several people with different builds will use the trainer.
- SoftStep pedals - a rubberized pad on the foot platform. You can feel the difference especially when you exercise in thin athletic shoes.
- SureGrip PVC handles - the manufacturer describes them as sweat-resistant, which matters with frequent use.
- UltraGlide bearings - steel ball bearings which, according to the manufacturer, are responsible for the smoothness of the motion.
Which model to choose?
| Your situation | The model we usually recommend |
|---|---|
| You want to see whether seated training is for you and do not need extras | FreeStep LT1 |
| You exercise briefly, a few times a week, on your own | FreeStep LT1 |
| You plan longer sessions and seat comfort matters to you | FreeStep LT3 |
| Several people with different builds will use the trainer | FreeStep LT3 (two seat positions) |
| You exercise in thin shoes and pedal grip matters to you | FreeStep LT3 (SoftStep pedals) |
Because the resistance, flywheel and console are identical, the LT1 is not a "weaker" trainer in terms of intensity - the difference is in comfort and finish. If you are torn between the models, write to us or give us a call: we will help you choose the version based on height, the number of users and how you want to exercise.
How much space does the FreeStep recumbent elliptical need?
On the product pages, the manufacturer gives the dimensions as 157.6 cm long, approx. 83 cm wide and 140.6 cm high. In the assembly manual, the width of the machine is given as 96.5 cm - when planning the space, it is safer to assume this larger value.
On top of that comes the clearance zone. The manual is clear: no objects should be within 61 cm of the machine, and nothing may be placed behind the pedal pivot axis, nor may hands or feet be put there. Adding 61 cm on each side gives a rectangle of about 2.8 x 2.2 m. This does not mean you need a separate room - it is enough that there is no furniture, cables or toys around the trainer during your workout, and after exercising you roll it closer to the wall.
Pre-purchase checklist
- Level, stable floor - the manual requires placing it on a flat surface, away from water and edges (e.g. stairs).
- Access to the room - the box measures 111.5 x 76.0 x 64.5 cm, and the machine weighs 48.5-50 kg. The manufacturer recommends assembling it where it will be used or close to that spot, so you do not have to carry the finished trainer.
- Delicate floors - when rolling it on its wheels over hardwood or laminate, be careful not to scratch the surface. Many people place the trainer on a protective mat.
- Children and pets - the flywheel-driven mechanism has spots where fingers can get pinched. The manual prohibits children and pets from coming near the moving joints.
- Home use only - the machine is not intended for outdoor use, gyms or rental services.
How to assemble and set up the FreeStep for the first time?
Assembly involves several steps: the rear stabilizer, pedals, seat, console beam, handle tubes, covers, handles and the resistance knob. An Allen key with a screwdriver is included. Instead of the paper manual, you can use the free BILT app - after searching for "Teeter", it shows the assembly in interactive 3D, step by step. A few practical notes from the manual:
- Hand-tighten the bolts first, and only use the wrench after all the parts of a given step are in place.
- The handle tubes are attached with 10 bolts, which you first screw in loosely and then tighten in the order shown in the diagram. Skipping this order is the most common cause of fitting problems.
- Watch out for the speed sensor cable - it must not get pinched when installing the console beam and covers.
- Batteries - the console runs on 2 AA 1.5 V batteries, which you insert into the compartment at the back of the console.
- Leveling feet - if the trainer wobbles, adjust the feet so that both rest on the floor.
Setting the seat height
The manual puts great emphasis on this and recommends setting the seat before every use. The procedure is as follows:
- Start with the seat in its lowest position.
- Sit down, place your toes in the upper part of the pedals and extend one leg to a full step.
- If your knee is slightly bent - that is your setting. If your knee is "locked" in full extension, keep the height but move your foot on the pedal. If your knee is bent more than a few degrees - raise the seat.
- To raise the seat, loosen the adjustment knob, grab the seat handles and gently push off with your legs until the knob locks into the next hole.
- Always tighten the knob in the hole before you start exercising.
Backrest, handles and resistance
- Backrest - press the knob at the back, recline the backrest and release the knob until it clicks into a hole. After reclining, you may need to adjust the seat height.
- Handle length - loosen the knob, pull it out (this releases the lock) and slide the handle. Set the length so that your back and shoulders stay against the backrest when your arms are extended.
- Grip - after releasing the lock, rotate the handles to the vertical or lower position and tighten the knob again.
- Resistance - the FreeStep arrives set to the highest resistance level. Before your first workout, turn the resistance knob to the lowest level. Turning it forward increases resistance, turning it back decreases it.
Console - kilometers instead of miles
This is a small detail customers often ask about: out of the box, the console shows distance and speed in miles. To switch to kilometers, remove the batteries, flip the MI/KM switch at the back of the console next to the battery compartment and put the batteries back in. The change will not work if the console is powered while switching. During exercise, the console automatically scrolls through the readings (time, calories, distance, speed); a short press of the button holds the selected reading, and pressing and holding resets the counter. When you stop exercising, the console turns off by itself.
How to plan your workouts on a home cross trainer?
We do not provide ready-made plans "for results" - everyone starts from a different place, and the FreeStep is equipment for regular activity, not a health program. A few practical organizing tips that work for our customers:
- Start with low resistance and increase it by 1-2 levels only once the motion feels smooth.
- Change settings during a session - a few minutes in standard mode, a few with the backrest reclined, a few with the lower handle grip. This varies your workout without changing equipment.
- A regular time - a trainer that stands within sight, e.g. by the TV, is easier to fit into your daily routine than equipment tucked away in the basement.
- Use the Teeter Move app - the manufacturer offers it without a subscription, with on-demand workouts.
- Leave room for a mat - a bit of floor next to the trainer comes in handy for lying-down exercises. You will find self-massage and stretching accessories that fit in one container next to the mat in the Recovery and Massage category.
- Finish calmly - slow down gradually, because the pedals keep moving for a moment after you stop.
Consult a doctor before starting a new exercise program - this is what the manufacturer recommends in the FreeStep manual.
How to care for the FreeStep - maintenance and storage
The FreeStep does not require complicated servicing. The manual lists a few rules worth turning into habits:
- Cleaning - only with a damp cloth. Do not use abrasives or solvents, as they may damage the machine.
- Inspection before a workout - check that all bolts are tight and that the seat, backrest and handle knobs are locked in their holes.
- Damaged parts - replace them immediately. Do not use the machine until it has been repaired.
- Warning labels - if you lose the manual or a label becomes illegible, contact us and we will help you get a replacement.
- Batteries - when the console readings fade or disappear, replace both AA batteries.
- Storage - always indoors, on a level surface.
How to move the trainer?
The transport wheels are at the back of the rear stabilizer. According to the manual, you first lift the machine by the beam under the console, then by the front crossbar, and roll the FreeStep on its wheels. The machine weighs over 45 kg, so lift it carefully and roll it slowly over laminate and hardwood.
Frequently asked questions
Is the Teeter FreeStep an elliptical?
Stores often call the FreeStep a recumbent or seated elliptical because - like an elliptical - it lets you work your arms and legs at the same time. In terms of design, however, it is a seated cross trainer (manufacturer: "Recumbent Cross Trainer") with a stepping motion rather than an elliptical path. You exercise on a seat with a backrest, and the pedals make a forward-pushing motion.
Does the FreeStep need electricity?
No. The console runs on 2 AA 1.5 V batteries, and resistance is generated by a magnetic brake that does not need power. So you can place the trainer anywhere in your home without looking for an outlet.
What is the maximum user weight and height?
Both models, the LT1 and LT3, are designed for users from 150 to 198 cm tall weighing up to 136 kg. The manual prohibits people above this weight limit from using the machine.
How much space does the FreeStep take up?
The machine is 157.6 cm long and 140.6 cm high, and its width - depending on the source - ranges from approx. 83 cm (product pages) to 96.5 cm (assembly manual). The manual also requires a clearance zone of 61 cm around the trainer. After your workout, you can roll it on its wheels closer to the wall.
How does the FreeStep LT3 differ from the LT1?
The resistance (13 magnetic levels), flywheel and console are the same. The LT3 has a thicker ComfortSelect seat with two mounting positions, SoftStep pedals with a rubberized pad, SureGrip PVC handles and UltraGlide steel ball bearings. The LT1 is a simpler version of the same mechanism.
Can you exercise on the FreeStep with only your arms or only your legs?
Yes, the manual describes both modes. When exercising with your legs only, you set the handles low and outward and hold the seat handle. When exercising with your arms only, you rest your feet on the front beam under the console and use the lower handle grip.
Is the FreeStep a medical device?
No. The Teeter FreeStep is training equipment for home use, intended - according to the manufacturer - for adults. It is not intended for treatment or rehabilitation. The manufacturer recommends consulting a doctor before starting an exercise program.
How to switch the console from miles to kilometers?
Remove the batteries from the console, flip the MI/KM switch at the back next to the battery compartment and put the batteries back in. The letter K, which stands for kilometers, will appear on the screen next to speed and distance.
- Teeter FreeStep LT1 Recumbent Cross Trainer - a seated cross trainer with 13-level magnetic resistance and a battery-powered console.
- Teeter FreeStep LT3 Recumbent Cross Trainer - the same mechanism with a ComfortSelect seat, SoftStep pedals, SureGrip handles and UltraGlide bearings.
- FreeStep Trainers - compare both models in one category.
- Recovery and Massage - Teeter self-massage and stretching accessories that fit next to the trainer.